
Why a Blind Hem is Essential
A blind hem stitch is the secret to polished, high-end garments. Perfect for formalwear like suit pants and evening gowns, it hides stitches completely, avoiding the bulky look of traditional rolled hems. This technique is especially crucial for lightweight fabrics such as silk or chiffon, where visible stitches can ruin the fabric’s delicate drape. Unlike standard hems, which struggle with curved edges, a blind hem smoothly follows flared skirts or round hemlines without puckering.
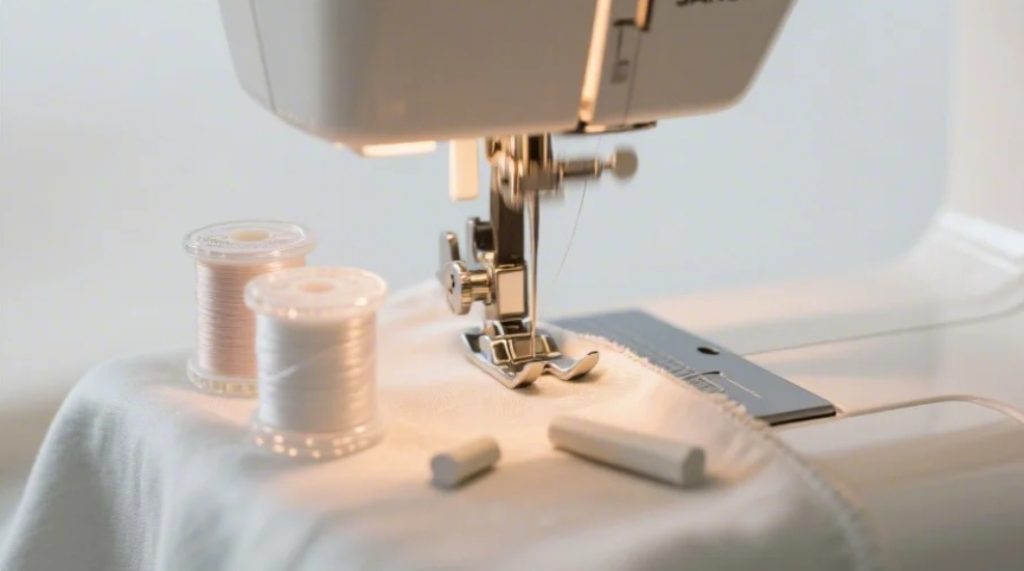
Tools & Preparation
Essential Tools:
- Blind Hem Foot: Features a guide blade to catch the folded edge. Compatible with most machines (e.g., Janome 200734001).
- Thin Needle (60/8): Prevents visible holes on delicate fabrics.
- Clear Nylon Thread: Blends seamlessly with fabrics.
- Fabric Stabilizer Spray: Temporarily bonds hems without pins (try June Tailor’s Shape-Flex).
Fabric Compatibility:
- Lightweight Fabrics: Reduce stitch tension to 1.5–2.0 to avoid puckering.
- Stretch Fabrics: Use a zigzag blind hem stitch (common on Brother machines) to accommodate movement. For more tips on handling stretch materials, see our guide on Solving Stretch Fabric Shrinkage.
Step-by-Step Machine Method
1. Prep & Press the Hem
- Fold the raw edge 0.5 inches inward, then fold it up again 0.25 inches to encase the edge.
- Press with a steam iron and use fabric stabilizer spray to secure folds—no basting needed!
- Mark the fold line with tailor’s chalk and a ruler for precision.
2. Machine Settings
- Select the blind hem stitch (often symbol #5 or #7—check your manual).
- Adjust settings:
- Stitch Width: 3.0 (determines how far the needle swings into the fold).
- Stitch Length: 2.5 (shorter length = less visible stitches).
- Test on scrap fabric.
3. Sewing the Hem
- Position the folded hem under the blind hem foot, aligning the guide blade with the fold.
- Stitch slowly, ensuring the needle barely catches 1–2 threads from the main fabric. On curves, hand-turn the wheel for control.
- Gently press the finished hem with a pressing cloth to set the stitches.
Hand Sewing Alternative
For couture-level finishes or silk organza hems:
- Thread a sharp hand needle with waxed double thread (reduces tangling).
- Use a pick stitch:
- Insert the needle through the folded edge, picking 1–2 threads from the main fabric every 0.2 inches.
- Pull the thread taut but not tight to maintain invisibility.
Troubleshooting & Pro Tips
Common Fixes:
- Crooked Stitches: Check if the presser foot pressure is uneven. Adjust using your machine’s dial.
- Fabric Wrinkles: Place tissue paper under the fabric while sewing, then tear it away afterward.
Advanced Hacks:
- Double-Sided Blind Hem: Use a specialty foot (like Singer’s #42) to hide stitches on both sides. Ideal for sheer curtains or reversible coats.
- Decorative Exposed Stitches: Swap nylon thread for contrasting embroidery floss on denim hems for a bold, modern look.
Conclusion
Mastering the blind hem stitch transforms homemade garments into professional-quality pieces. Whether you’re hemming a silk slip dress or tailoring wool suit pants, this technique ensures a clean, invisible finish. For delicate fabrics, always test settings on scraps first, and don’t shy away from using stabilizers like tissue paper or spray—they’re game-changers for avoiding puckering.
Hand-sewn hems, while time-consuming, offer unmatched precision for couture projects. Pair these methods with tools like a blind hem foot and clear thread, and you’ll tackle everything from bridal wear to everyday linens with confidence. For deeper insights into advanced stitches, explore Threads Magazine’s Mastering the Blind Hem Stitch guide, which breaks down tension adjustments for 20+ machine models.
Ready to level up? Browse our Advanced Sewing Guides for tutorials on French seams, bound buttonholes, and more!

